Your account
Add a colleague and choose what they see in Excel
Invite a colleague from the Rows portal, then switch on only the entities they should see. Nobody on your account sees an entity until you give it to them.
- Less than 5 minutes


 Xero, QuickBooks Online and Zoho Books
- Excel for Windows and Mac

On this page
Before you add a colleague
- To invite people, you need to be the account owner, or have Manage users switched on for you.
- The email address of the person you're adding. One email address belongs to one Rows account, so use the address they'll work from.
- The entities you want to share, already connected to Rows.
Give a colleague access, from invitation to Excel
Open Users in the Rows portal
In your browserSign in to the Rows portal and select Users in the menu on the left. It lists everyone on your account with their role (Owner or User), when they last logged in and whether they've accepted their invitation.
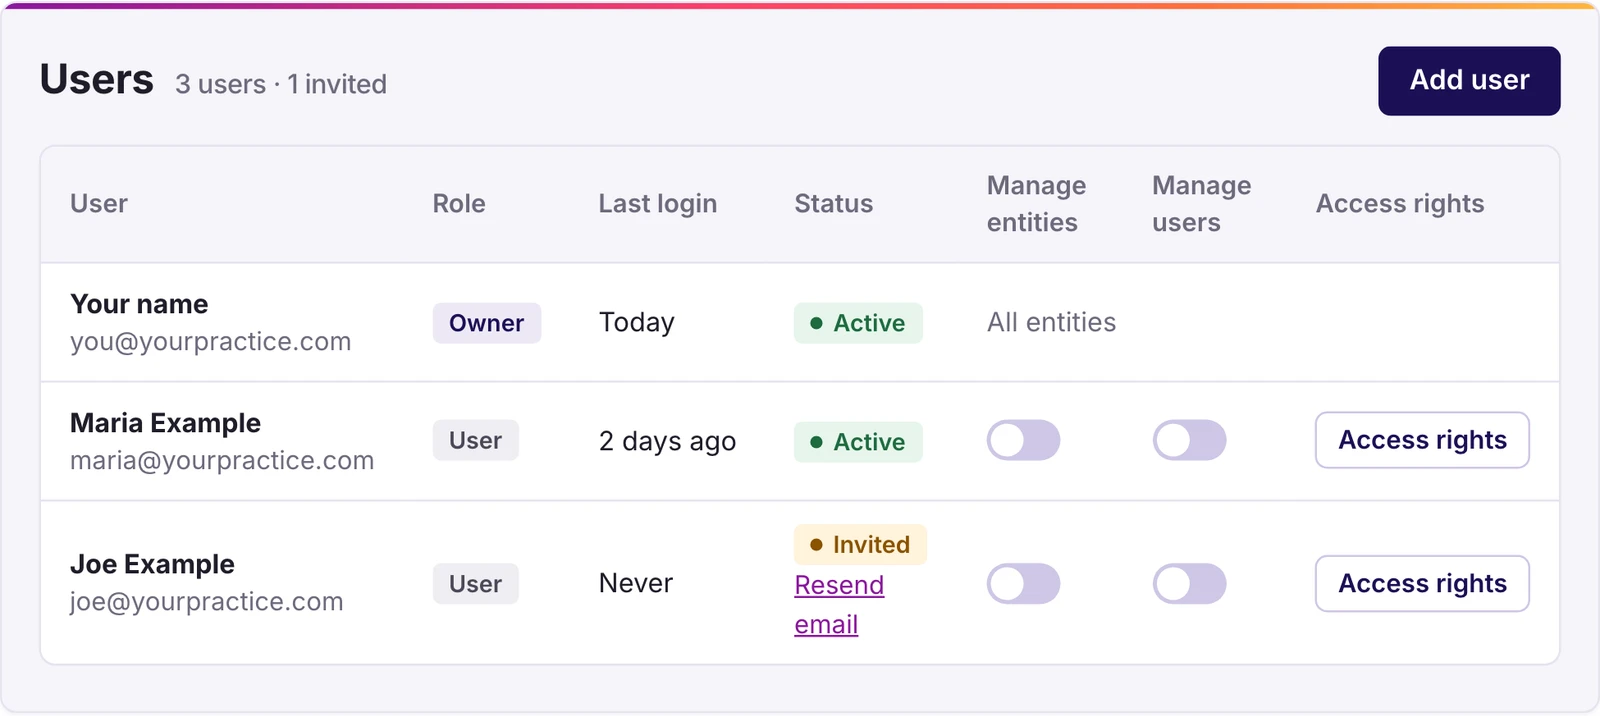
Rows portal, Users Invite them by email
In your browserSelect Add user and enter their first name, last name and email address. Under Access, choose Every entity, including ones added later, or Only the entities I pick on the next screen. Then select Send invite. They appear on the list as Invited.
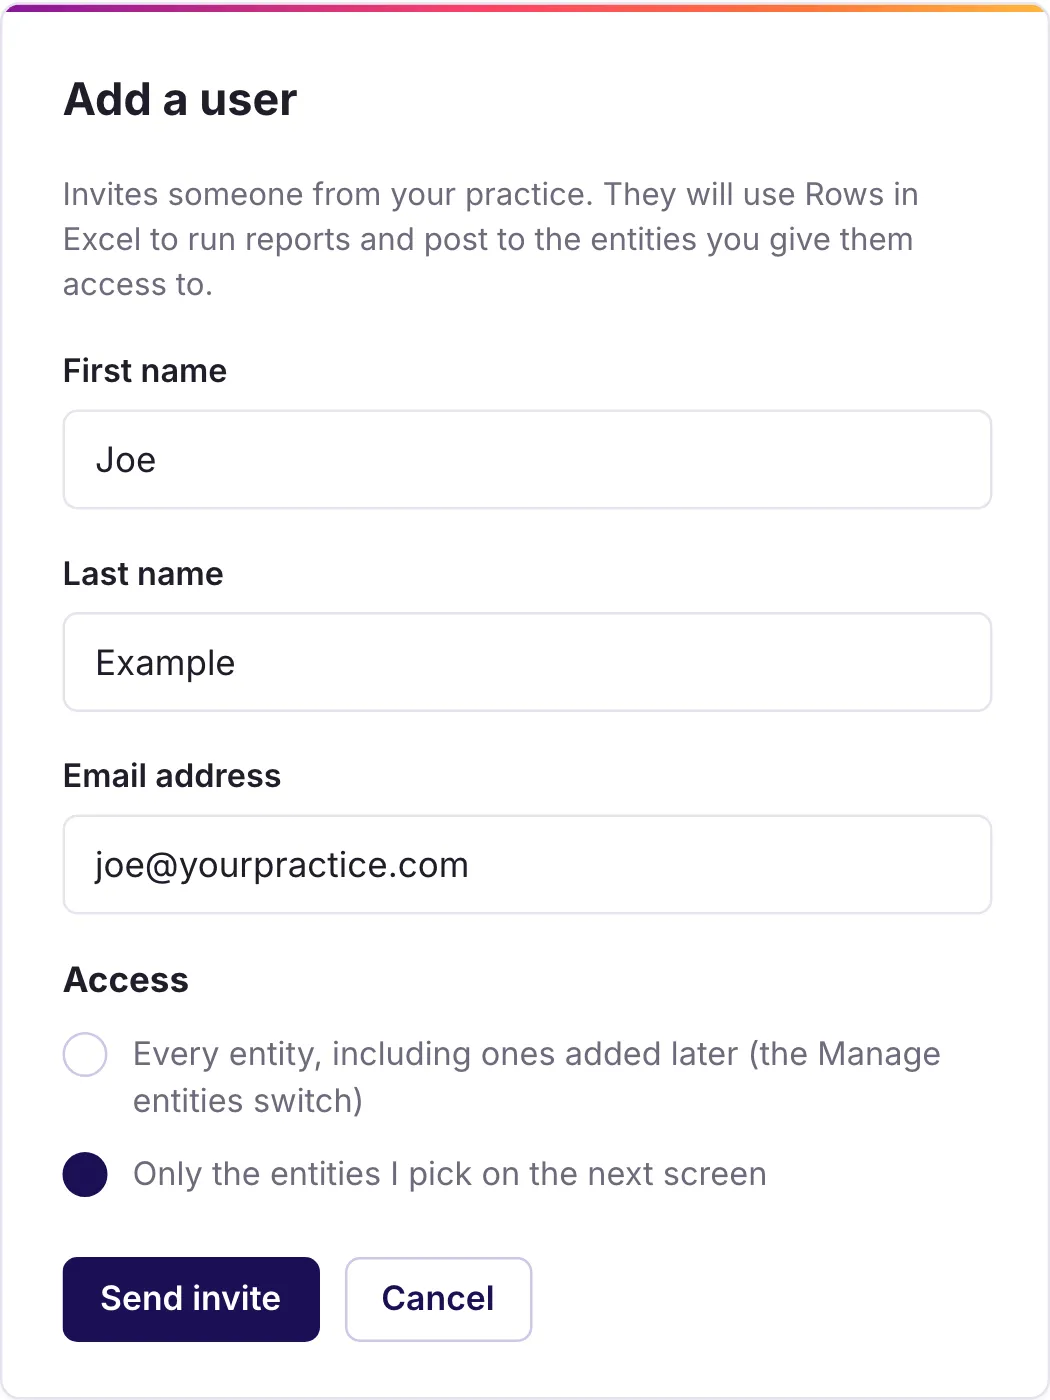
Rows portal, Add a user They activate their account
In your browserThey get an email from support@rowsapp.com with an Activate Account link. If it isn't there within a few minutes, they should look in junk or spam. The link opens a page where they set a password: more than 12 characters, with capitals, lower case letters, numbers and symbols. Once they're in, Users shows them as Active.
The invitation email Choose their entities
In your browserIf you chose Only the entities I pick, Access rights opens once the invite is sent; later you open it from their row. Switch on each entity they should see. On Practice and Firm you also choose what they can do with each one: Refresh Only to refresh, Full Read to pull data or Write to post back. On Business and Business Plus, anyone with an entity can do everything you can with it.
Rows portal, Access rights Limit what they can do
In your browserOn Practice and Firm you can narrow it further. Next to an entity in their Access rights, select Limit access rights, untick the tables, reports or templates they shouldn't use, then Save. Untick Manual Journal Template, say, and a junior can refresh the month-end reports but can't post a journal. Apply to all entities copies the choice to every entity they have.
Rows portal, Limit access rights Let them manage users or entities
In your browserMost people can skip this step. Two switches on their row give more: Manage users lets them invite and remove people, and Manage entities gives them every entity on the account and lets them connect new ones, give an entity a friendly name, disconnect one, and see its usage and properties. Choosing Every entity, including ones added later in step 2 switches it on for you. Turn Manage entities off again and those entities go with it.

That's the portal done. Now your colleague opens Excel.
They check what they see in Excel
In ExcelThey open the Rows pane in Excel and sign in with the login they just set up (Sign in to Rows in Excel and the portal shows how). No Rows in their Excel yet? Install the Excel add-in first. Choose your Entity lists only the entities you switched on. If they were already signed in when you gave them access, they log out of the Rows pane and sign in again to see the new ones.
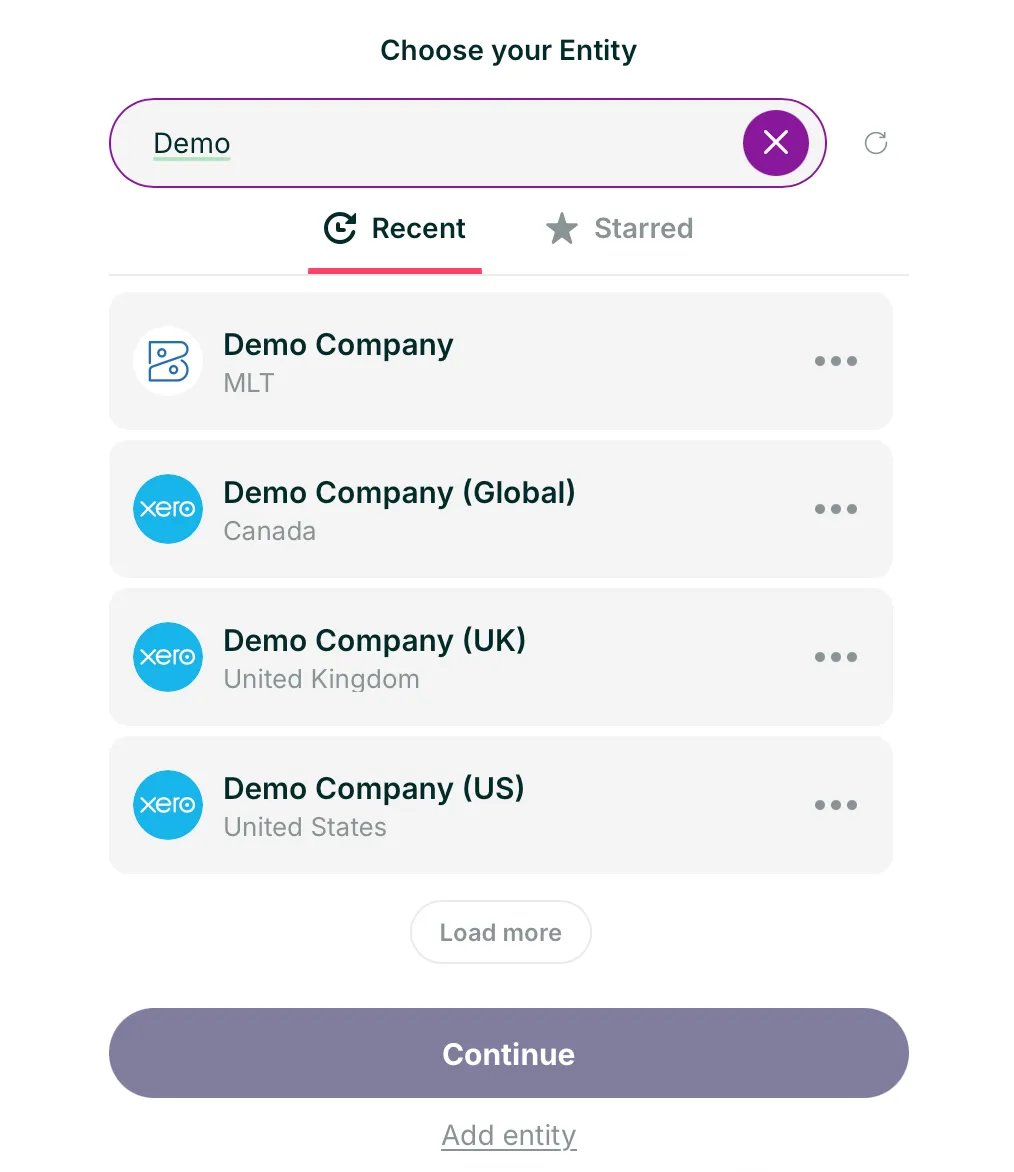
Rows pane, Choose your Entity
Change or remove access later
Take an entity away
Open their Access rights and switch that entity off.
See who has an entity
On Entities, select Add user on its card. The bin next to a name takes that person off the entity.
Send the invitation again
Select Resend email next to Invited on their row.
Remove someone from your account
Select the three dots at the end of their row, then Delete user. They can no longer sign in.
If a colleague can't get in or see an entity
The invitation didn't arrive
Ask them to check junk or spam, then select Resend email on their row. If Rows says the person is already an account owner or staff member elsewhere, that email address has its own Rows account. Ask them for another address to invite.
My colleague can't see an entity
Check their Access rights: the entity has to be switched on. Then ask them to log out of the Rows pane and sign in again. Colleagues can't connect entities themselves, so connect it first if it isn't in your list.
Is there a limit on users?
No. Every plan lets you add as many colleagues as you need. Plans differ in how many entities you can connect.
Can I take an entity away again?
Yes. Switch it off in their Access rights. Their saved workbooks stay, but they can't refresh that entity or post to it any more.
Next step
Next guidePull your first report into ExcelYour colleague runs a profit and loss from the Rows pane and refreshes it whenever the books change.Setting up Rows for the first time? Start with Get started with Rows for Excel. Looking for something else? Browse every guide in the Help centre.
Talk to a person
Email support
Tell us what you see on screen. We reply within 24 hours on working days.
support@rowsapp.comBook an onboarding call
Free during your trial. We'll connect your entities with you and set up your first live report.
Book a call